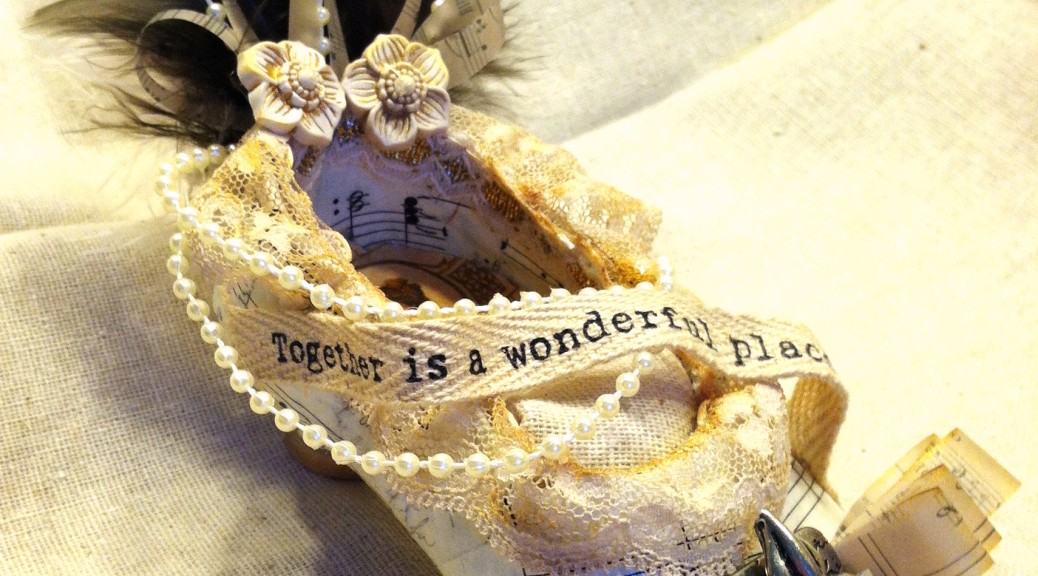
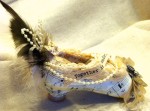
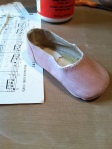
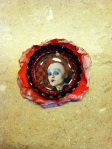
Well you saw the pink baby shoe that was altered into a pincushion. That little beauty was sent to live with someone else. Who loved receiveing it. Now I bet you wondered whatever happened to the other baby shoe….left all alone… well in the process of things called a life and the fact that it takes time to blog….I forgot to post what I made with that other darling baby shoe….so here it is….the untold story of the other baby shoe….now as you can tell this shoe looks quite a bit different than the pincushion baby shoe….truth is I cut off the high top of the shoe….at this point I wasn’t afraid to cut and trim and repurpose it since the first shoe turned out so fine. Well getting up my courage, I then mod podged on vintage sheet music I was lucky enough to purchased a whole book at an estate sale for 50 cents. The sweet old lady had been a piano teacher and had around 100 books….seriously why did I ever pass up a find like that?!? Well never thought I’d actually use them…..so moving on….the shoe turned out perfect….I was hesitant to do more with it…I could have just put on a flower and called it good….but of course not….I love to alter things and the more I put on something the better I feel in the end….anyone else feel that way too?? The more the merrier? Looking at the shoe it needed something….with the height gone on top I decided to give it height from below so to the bottom of the shoe I glued on a wooden spool to make it look like a heel. Yep I know I could have used anything for a heel so why a spool?? No idea maybe it was the wood color I really liked….anyway from there I had to add something inside….I did try to fill it with a stuffed burlap, but it just didn’t look good….so I browsed the internet and found a very pretty vintage image ….honestly I’m not sure where I hyperlinked to get the image….should I come across it again I’ll be sure to put up a link and share it. Well of course I distressed the picture with Tim Holtz crackle glaze. If you’ve never used it, go out and buy some…best stuff EVER for putting a fun crackle glaze on things AND best of all it’s super easy to use. At this point it still needed more so what do I add……vintage lace, pearls, handmade flowers (a youtube find and I’ll be sure to post the link) a buckle, a fleur de lis, a little vellum bow, feathers……honestly I didn’t want to stop adding…but there comes a point where there’s just no more room to add more so you stop…..and voila! A vintage altered baby shoe!! I know you’ll never see baby shoes the same….well I don’t…I’m always on the hunt for more cute shoes to turn into fun altered items…..This little shoe treasure found a new home with one of my swap ladies…..it actually matched an easter egg I had altered and sent her…but that is definately another story….till then enjoy!!
In the theme of altered creations and the fact I hate throwing away anything that can be reused….I had a scentsy bulb burn out a few weeks ago…this is one of the larger warmers so the bulb is small and perfectly round…it’s cute small…if you know what I mean….well if you’ve ever pinterested “bulb ornament” you’ll get all kinds of ideas to make a christmas ornament out of a lightbulb since it’s of the right shape and size…. well I did one better and made it into a hanging plant holder…pinterest “lightbulb plant vase”…I wrapped hemp cording around the opening after busting off the metal part…this was one of those times when a good pair of safety glasses came in quite handy…I hot glued hemp cording around the perimeter of the bulb to give my loope something to cling to so I could hang it up….I rinsed out the inside of the bulb very carefully, added some water and placed my little plant inside….Isn’t this cute….a little hanging plant orb that could be an ornament too….just another idea to get you inspired
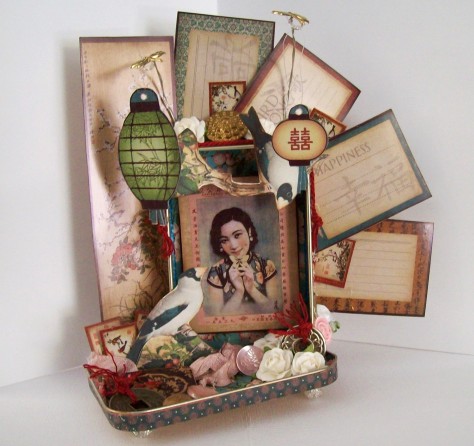
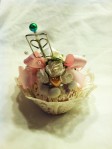
I was so inspired by the Birdsong paper from Graphic 45 I made an altered altoid tin diorama. I used vintage buttons and trinkets from my stash. Glass beads were used for the feet on the bottom. I removed the lid and placed the main body of the tin on it. Everything was hot glued using a low temp glue gun.
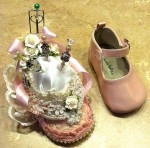
I was browsing facebook and I came across the idea of altering a shoe–not sure what post I saw it on or where but I was instantly intrigued. I know it sounds strange and why would you want to alter a shoe…well I have to tell you it’s one of THE most creative things I’ve done in a while! It’s very addicting too…since making this baby shoe I’ve altered 4 other shoes and I have more awaiting my creative muse! For this baby shoe I used a size 2 girls mary jane with a soft soled bottom. I had some beautiful lace from a wedding dress I tore loveingly apart for just such an occasion as this. Since this was such a small shoe I decided to make it into a pin holder for hat pins (which you can see in an earlier post). All of the embellishments on the shoe were hot glued using a low temp glue gun. I hope it inspires you to think outside your box and repurpose something you would never have thought to repurpose!
Sooo for a year I had a small bedroom all to myself for crafting. I had no complaints what-so-ever…..but then I came to the realization that I also had a full basement that was just calling to be used. I had given it to my kids to have as their “domain”…. as their own apartment downstairs, but they never did anything with it besides fill it with junk…so I “flipped” the house….. literally. I decided to make the basement into my personal master retreat. We have 3 bedrooms, 2 “living” areas and a bathroom downstairs…perfect retreat! I feel like I have my own apartment! LOL I’m only partial sub-terranium and have 4′ high windows…it’s amazing how much light I have to create with in my new space. The pics were taken at night so you don’t get to see the light but the amount of space is amazing!
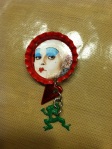
I am crazy addicted to anything Wonderland themed. I’m particularly fond of the Red Queen so I hosted a swap on Splitcoaststampers for altered bottlecap magnets and made my set all about the Red Queen. The box was made by cricut’s Boxes, bag, tags and more….love that cartridge. It’s a window matchbox though I made it so it won’t open.
I had a dream about a steampunk’d mickey mouse. Not really sure why I had a dream of a steampunk Mickey but dreams are what they are. Now making a dream become reality is a bit more challenging. After searching for 2 months for the right “trinkets” and with a little help from a friend (yes you Sabrina) I finally brought Mickey to life! I found this great picture on the web and I will have to give credit to the site. I cut it down and using e6000 glue I painstakingly glued each gear and bead to the picture. I love how it turned out! The e6000 glue also gave a bit of dimension to the piece as well. Hope I inspire an inner steampunk vision to come to you!
Dusted off the cricut and made a cute little holder for some altered corsage pins I made. There are some amazing ideas on youtube but the one I kept going back to were ones made with the cricut. This is from the “sophisticated” cartridge using the fleur de lis. I layered the fleur de lis, 2 times on the main design, spaced with foam dots. Then made a shadow and put a piece of sheer ribbon on the back, followed by a layer of foam dots and finally the back shadow. This layering creates space for the pins to go in and be stored. Love how elegant this turned out–super simple, quick and easy!!
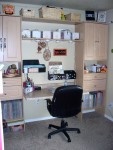
This is my craftroom. Welcome! I get an entire bedroom to myself! I’ve had the closet organizers and counter tops forever and whenever we move I just take them with me. Love how quick and easy these are to set up, they make any place home for me! For this room I have a south facing window and I don’t get a lot of sunlight–I love sunlight–so I’ve added undercounter light to each work area so it doesn’t feel as dark. I have 2 4′ countertops that are mounted with monster braces on the wall in the studs. So far they’ve held up well! The pink filing cabinet I acquired for free and took some krylon paint and sprayed it. I love it and when I get tired of the pink, I can always change it for cheap! On the back of my door is a clear shoe organizer that I made into an embellishment organizer. This is only a small grouping of my embellies, but they’re the ones I use the most so I made them easy to get to. Since the door to my craftroom stays shut, I have my plants in this room. My cats love to eat my plants and will decimate a plant in a few hours! Here my beauties are safe and I love how lush they are! Well that’s it, small but neat and tidy! Thanks for visiting my crafty space!
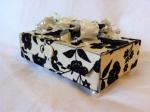
I love Philly Cream Cheese Boxes. They’re the perfect size to make into fun little treasure holders. I altered this box in a vintage theme for a Valentine swap I’m in. I used DCWV paper that has a velvety feel. The bow is made from “pieces” of ribbon I had left over from another swap. I hot glued all of the pieces together and they really turned out nice and you can’t tell it was pieced together! There’s some velvety ribbon hidden in there as well. The jewel in the center was a hair accessory I upcycled. For the inside, I have all kinds of trinkets in my bins and pulled a few and glued them on the lid. The music is from an old music book I found. The feet are pearl beads that I hot glued in place. I had so much fun making this and it only took a few hours from start to finish.